From Garden to Jar: Preserving Summer's Best with Pickled Sugar Snap Peas
As the vibrant hues of spring give way to the bounty of summer, few vegetables capture the season's essence quite like the sugar snap pea. These crisp, sweet pods are a fleeting delight, gracing our tables for a precious few weeks before disappearing. But what if you could capture that peak-season freshness and enjoy it long after the garden has faded? Enter the magical world of canning, where humble ingredients are transformed into shelf-stable treasures. Canning
pickled sugar snap peas allows you to savor their unique crunch and sweet-tart flavor all year round, a bright burst of summer even on the coldest winter day.
This comprehensive guide will walk you through everything you need to know to successfully preserve these delectable peas, turning your garden's abundance into jars of tangy perfection.
Embracing the Sweet Crunch: Why Pickle Sugar Snap Peas?
For many, the mention of pickling conjures images of cucumbers, but the truth is, a vast array of produce shines when introduced to a well-balanced brine. Sugar snap peas are particularly exceptional candidates for pickling for several compelling reasons:
*
Unmatched Texture: Unlike many vegetables that soften significantly when pickled, sugar snap peas retain an incredibly satisfying crunch. The brine works its magic, enhancing their natural crispness, making them an exciting textural addition to any dish.
*
Sweet-Tart Harmony: Their inherent sweetness perfectly complements the tangy vinegar brine, creating a delightful flavor profile that is both refreshing and addictive. This makes them a versatile accompaniment, cutting through rich flavors or brightening up lighter fare.
*
Seasonal Preservation: For those who have grown weary of heavy winter vegetables, a jar of brightly flavored
pickled sugar snap peas is a welcome respite. It's a testament to the joy of seasonality, allowing you to extend the peak freshness of your harvest and enjoy that "just picked" taste for months.
*
Versatility: Whether served as a standalone snack, a vibrant addition to salads, an unexpected charcuterie board element, or even a garnish for your favorite cocktail, these pickles add a gourmet touch.
The anticipation of their short season, and the desire to extend their presence, makes pickling them an irresistible endeavor for any home gardener or food enthusiast.
Gathering Your Arsenal: Ingredients and Equipment for Canning
Successful canning hinges on having the right ingredients and equipment, coupled with meticulous preparation. When preserving
pickled sugar snap peas, safety and flavor are paramount.
Key Ingredients:
*
Sugar Snap Peas: Aim for fresh, firm, blemish-free pods. You'll need enough to fill your desired number of jars. For a typical batch, 2-3 pounds will yield several pints. Remember to wash, trim the ends, and remove any tough strings from the pods.
*
Distilled White Vinegar: This is non-negotiable for canning. Its consistent acidity (5%) is crucial for safe preservation, and its clear nature won't discolour your peas. Do not substitute with other vinegars unless a tested recipe specifically calls for them.
*
Water: Clean, cold water for your brine.
*
Pickling or Kosher Salt: Use salt specifically labeled for pickling or coarse kosher salt. Regular table salt often contains anti-caking agents that can cloud your brine and may contain iodine which can discolor your vegetables.
*
Granulated Sugar: Balances the acidity of the vinegar and enhances the peas' natural sweetness.
*
Flavor Enhancers (Optional but Recommended):
*
Garlic: Fresh cloves, peeled and perhaps halved or sliced.
*
Dried Chili Peppers or Red Pepper Flakes: For a touch of heat.
*
Pickling Spices: A pre-mixed blend or individual spices like dill seed, mustard seed, coriander seed, and peppercorns. These add depth and complexity.
Essential Canning Equipment:
*
Canning Jars: Pint or half-pint jars are ideal for sugar snap peas. Ensure they are clean and free from chips or cracks.
*
New Lids and Bands: Always use new canning lids for each canning project to ensure a proper seal. Bands can be reused if in good condition.
*
Large Non-Reactive Saucepan: For preparing your brine.
*
Water Bath Canner with Rack: Essential for processing your jars to create a vacuum seal and ensure shelf stability.
*
Jar Lifter: For safely moving hot jars.
*
Canning Funnel: Helps keep jar rims clean when filling.
*
Headspace Tool/Bubble Remover: To ensure proper fill levels and remove trapped air.
*
Clean Towels: For wiping jar rims and handling hot jars.
*
Ice Bath: For blanching the peas (a crucial step!).
The Art of the Brine: Crafting the Perfect Tangy Elixir
The brine is the heart of any pickle, a carefully balanced mixture that imparts flavor and ensures preservation. For canning
pickled sugar snap peas, the acidity of the brine is critical for food safety.
While quick-pickling recipes might use a more concentrated vinegar-to-water ratio for immediate refrigeration (like the 1:1 ratio often seen in recipes for a fast 24-hour pickle, as detailed in our guide
Unlock Fresh Flavor: Pickled Sugar Snap Peas Ready in 24 Hours), a slightly different ratio is often preferred for water bath canning. The goal is still high acidity, but canning brines are often formulated to be palatable after a longer "cure" time and processing.
A common and safe brine ratio for water bath canning vegetables is:
* 3 cups distilled white vinegar
* 5 cups cold water
* 2 tablespoons pickling or kosher salt
* 1/3 cup granulated sugar (adjust slightly to your taste, but do not reduce significantly for safety)
* Optional: 2 tablespoons pickling spice (or your preferred blend)
Preparation:
1. In your non-reactive saucepan, combine the vinegar, water, salt, sugar, and any desired pickling spices.
2. Heat the mixture over medium-high heat, stirring until the salt and sugar are completely dissolved.
3. Bring the brine to a rolling boil, then reduce the heat and let it simmer for at least 5 minutes to allow the flavors to meld, especially if using pickling spices. Keep the brine hot while you prepare your jars and peas.
From Prep to Preservation: A Step-by-Step Canning Guide for Pickled Sugar Snap Peas
Now for the exciting part – transforming your fresh peas into shelf-stable jars of deliciousness!
Step 1: Prepare Your Canning Equipment
* Wash jars, lids, and bands thoroughly with hot, soapy water. Rinse well.
* While lids no longer require pre-sterilization, keeping them warm can help ensure a good seal. Bands can be set aside.
* Place the rack in your water bath canner and fill it about halfway with water. Bring the water to a simmer (180°F / 82°C) or boil while you work. For hot packing, ensure jars are hot before filling. You can heat them by placing them in the simmering canner water.
Step 2: Prepare the Sugar Snap Peas
* Wash the sugar snap peas thoroughly.
* Trim the stem ends and remove the tough strings that run along the seams of the pods.
*
Blanching: This is a crucial step for canning sugar snap peas. Bring a large pot of water to a boil. Prepare a large bowl of ice water.
* Working in batches, drop the trimmed peas into the boiling water for 3-4 minutes. This helps them retain their vibrant color, removes excess air, and makes them more pliable for packing.
* Immediately transfer the blanched peas to the ice bath to stop the cooking process and preserve their crispness. Drain them well before packing.
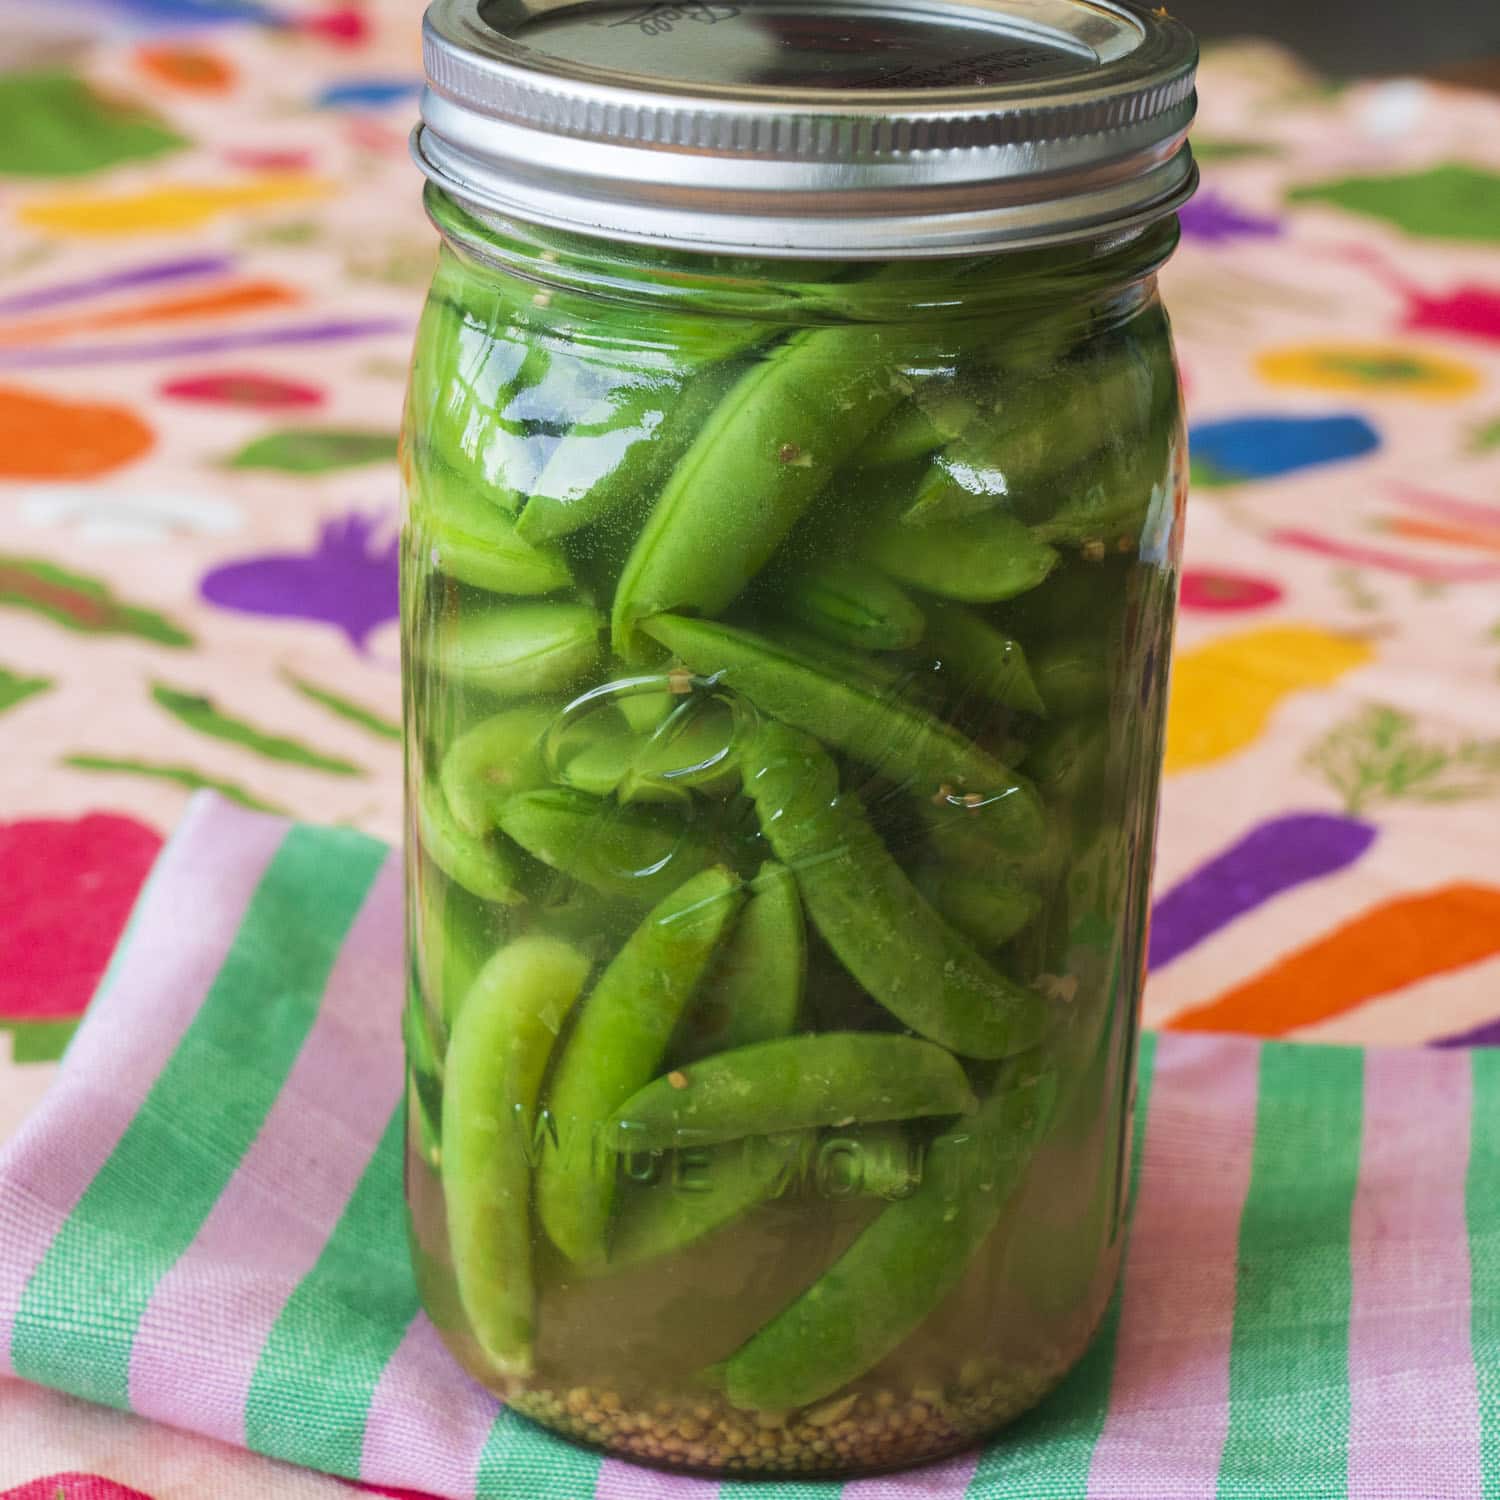
Step 3: Pack the Jars
* Carefully remove hot jars from the canner (if pre-heating there) using a jar lifter.
* Place 1-2 peeled garlic cloves and a dried chili pepper or a pinch of red pepper flakes (if using) at the bottom of each jar.
* Pack the blanched and drained sugar snap peas tightly into the hot jars, leaving 1/2 inch of headspace (the space between the top of the food and the rim of the jar). Don't crush them, but ensure they are snugly arranged.
Step 4: Fill with Brine and Prepare for Processing
* Using a canning funnel, carefully pour the hot brine over the packed peas, ensuring they are fully submerged. Maintain the 1/2-inch headspace.
* Gently tap the jars on the counter or use a non-metallic headspace tool to remove any trapped air bubbles. Add more hot brine if necessary to maintain the 1/2-inch headspace.
* Wipe the rims of the jars clean with a damp cloth – any residue can prevent a proper seal.
* Center a new, warm canning lid on each jar.
* Screw on the bands fingertip-tight (just enough to resist with your fingertips, not overtightened).
Step 5: Process in a Water Bath Canner
* Carefully place the filled, sealed jars onto the rack in your simmering water bath canner. Ensure the jars are not touching each other.
* Add more hot water to the canner if needed, making sure the tops of the jars are covered by at least 1-2 inches of water.
* Bring the water to a rolling boil. Once boiling, begin your timer.
*
Process pint jars for 10 minutes at sea level. For altitudes above 1,000 feet, you'll need to adjust processing times. (e.g., add 5 minutes for 1,001-3,000 ft, 10 minutes for 3,001-6,000 ft, etc. Always consult a reliable canning guide for precise altitude adjustments).
* Once the processing time is complete, turn off the heat and remove the canner lid. Let the jars sit in the hot water for 5 minutes before carefully removing them.
Step 6: Cool and Check Seals
* Using your jar lifter, carefully transfer the hot jars to a clean towel on your countertop, leaving several inches of space between them. Do not disturb them for 12-24 hours.
* As they cool, you'll likely hear a "pop" sound as the lids seal.
* After 12-24 hours, check the seals. Press the center of each lid; if it doesn't flex, the jar is sealed. Remove the bands, wipe down the jars, label them with the date, and store them in a cool, dark place. Any unsealed jars should be refrigerated and consumed within a few weeks.
For even more foundational pickling wisdom and tips applicable to various vegetables, consult
Crisp & Sweet: Your Ultimate Guide to Pickling Sugar Snap Peas.
Enjoying Your Harvest: Tips for Perfect Pickled Sugar Snap Peas
While the allure of tasting your freshly canned
pickled sugar snap peas immediately is strong – and they are certainly edible after processing – patience truly pays off. The flavors of canned pickles develop and meld over time. Most recipes suggest waiting at least two weeks before enjoying them, allowing the peas to fully absorb the tangy, sweet, and spicy notes of the brine. For optimal flavor, some prefer to wait even longer, up to a month.
Once opened, store your jar of pickled peas in the refrigerator and consume within a few weeks. They are fantastic as:
* A crisp, refreshing side dish.
* A bright addition to salads, especially those with creamy dressings.
* An exciting element on a cheese or charcuterie board.
* A garnish for sandwiches or wraps.
* A unique topping for tacos or grain bowls.
* A zesty snack straight from the jar!
Conclusion
Canning
pickled sugar snap peas is more than just a culinary technique; it's an act of preserving a moment in time, a tangible connection to the vibrant flavors of summer. From the delicate crunch of the freshly picked pea to the shelf-stable jar ready to be opened months later, this process is deeply rewarding. With a few simple ingredients, basic canning equipment, and a little patience, you can extend the joy of sugar snap peas far beyond their fleeting season, bringing a burst of garden-fresh flavor to your table whenever the craving strikes. So, roll up your sleeves, gather your peas, and embrace the satisfying journey from garden to jar!